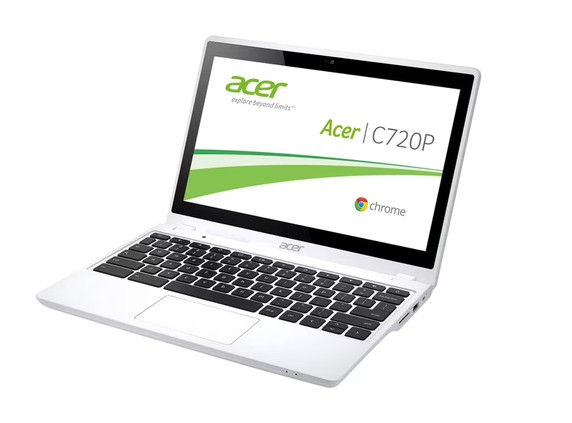
Older Chromebooks can still be useful long after ChromeOS support ends. One good example is the Acer Chromebook C720P, a small touchscreen Chromebook that can be converted into a lightweight Linux laptop.
Instead of throwing it away, you can replace the original Chromebook firmware with standard UEFI firmware and install a modern Linux distribution such as Fedora Xfce, Fedora LXQt, Debian, Linux Mint Xfce, or Xubuntu.
Why Convert the C720P to Linux?
- Web browsing
- School work
- Programming
- Arduino development
- SSH and server management
- Lightweight office applications
- Learning Linux
Before You Start
The Acer C720P uses the Chromebook board name PEPPY and is supported by the MrChromebox firmware project.
Important: Back up anything important before starting. Enabling Chromebook Developer Mode will erase local ChromeOS data.
You will need:
- Acer C720 or C720P
- Small Phillips screwdriver
- USB flash drive
- Internet connection
- Another computer to create the Linux installer
- A 64-bit Linux ISO
Step 1: Enable Developer Mode
Turn the Chromebook off. Hold Esc + Refresh and press the Power button.
At the recovery screen press:
Ctrl + DFollow the prompts to enable Developer Mode. The Chromebook will erase its local data and reboot.
Step 2: Disable Firmware Write Protection
The C720P uses a physical write-protect screw. Turn the Chromebook off, disconnect the charger, remove the bottom cover, and remove the motherboard firmware write-protect screw.
Keep the screw somewhere safe in case you ever want to restore the original configuration.
Step 3: Start the ChromeOS Developer Console
Boot ChromeOS again. At the login screen press:
Ctrl + Alt + F2Log in as:
chronosNormally no password is required.
Step 4: Install MrChromebox UEFI Firmware
Download the firmware utility:
cd
curl -LOf https://mrchromebox.tech/firmware-util.sh
Run it:
sudo bash firmware-util.shBefore continuing, verify that the utility correctly detects the Acer C720/C720P and the PEPPY board.
Select Install/Update UEFI (Full ROM) Firmware.
When offered a firmware backup, create one and save it somewhere other than the Chromebook’s internal SSD.
After the firmware installation completes, shut the Chromebook down.
Step 5: Create a Linux USB Installer
Download a current 64-bit Linux distribution. Lightweight choices include:
- Fedora Xfce
- Fedora LXQt
- Debian Xfce
- Linux Mint Xfce
- Xubuntu
Create the bootable USB with Fedora Media Writer, Rufus, balenaEtcher, or another trusted imaging tool.
Step 6: Boot Linux
Insert the Linux USB drive and turn the Chromebook on. Press Esc at the UEFI startup screen and choose the USB drive.
If the distribution provides a Live environment, test Wi-Fi, keyboard, touchpad, touchscreen, audio, USB ports, and battery detection before installing.
Step 7: Install Linux
Start the Linux installer. If you no longer need ChromeOS, choose the option to erase the internal drive and install Linux.
When installation finishes, remove the USB drive and reboot. The Chromebook should now boot Linux directly from its internal SSD.
Upgrading the Storage
The Acer C720P uses an M.2 2242 SATA SSD, not an NVMe SSD.
If you later replace it with a larger drive, such as a 1 TB M.2 2242 SATA SSD, you do not need to repeat the MrChromebox firmware conversion. The UEFI firmware is stored on the motherboard, not on the SSD.
You can simply reinstall Linux or clone the existing Linux installation to the new SSD.
What About Wi-Fi?
The original C720P uses an older Qualcomm Atheros Wi-Fi chipset that is integrated into the motherboard rather than installed as a removable M.2 Wi-Fi card.
The original adapter has good Linux support. If you want faster wireless networking, the easiest upgrade is a Linux-compatible USB 3.0 Wi-Fi 6 adapter.
For this older Chromebook, Wi-Fi 6 is generally more practical than Wi-Fi 7.
Recommended Final Setup
Acer Chromebook C720P
        |
        +-- MrChromebox UEFI Full ROM
        +-- Fedora Xfce or LXQt
        +-- 1 TB M.2 2242 SATA SSD
        +-- Original internal Wi-Fi
        +-- Optional USB 3.0 Wi-Fi 6 adapter
Final Thoughts
The Acer C720P may be old, but it can still be useful for browsing, programming, school work, server management, and general Linux experimentation.
The most important parts of the conversion are installing the correct UEFI firmware and keeping a backup of the original Chromebook firmware. After that, installing or replacing Linux works much like it does on a normal PC.

